


Performing outbound sales using your email client just doesn’t scale. Not only is this time consuming but keeping track of who to email and when to follow up can rapidly turn into a full time job.
With Hexospark, you can create entire outbound email campaigns with a high level of personalization to nurture leads and track the effectiveness of your campaigns to keep your pipeline flowing.
Let’s explore how you can create your first email campaign from scratch with Hexospark.
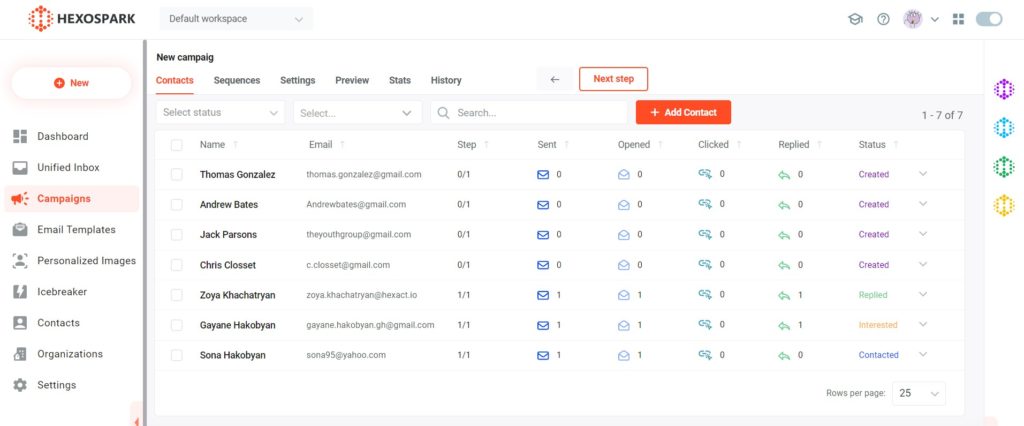
Step 1: Select your contacts
You can either add contacts now, as well as when a campaign is live.
To add contacts to your campaign you can select existing contacts from your CRM or upload a CSV file.
More contacts can be added to an existing campaign at any time.
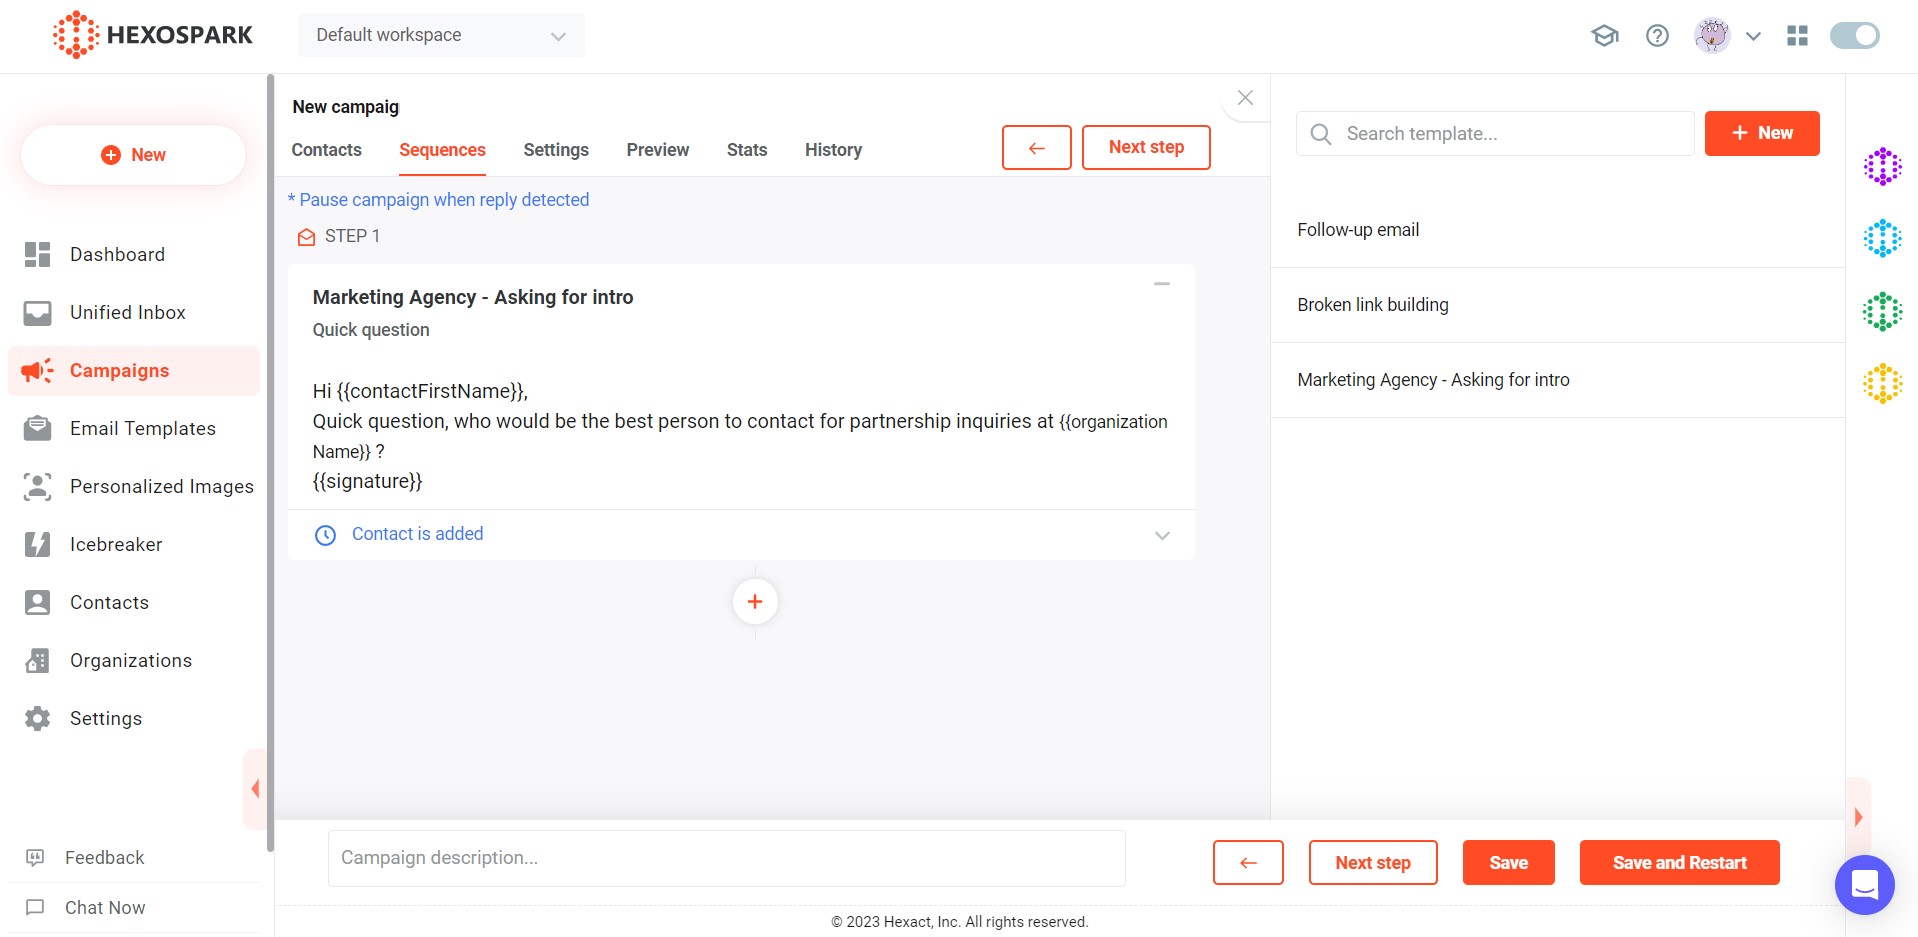
Step 2: Create your sequence of emails
The “Sequences” section allows you to create new emails or select from existing email templates.
Hexospark supports deep personalization via custom variables. These can be used to include any field or custom variable associated with a contact in your CRM inside the subject or body of your email.
Each email in your campaign can be scheduled to be sent at a specific time after a contact is added to your campaign as well as based on specific trigger events such as when a contact replies to an email or if a contact hasn’t replied yet.
Step 3: Set your campaign settings
This section allows you to specify campaign level settings including your reference timezone, the time window within which emails should be sent in a day, days of the week to send emails on, and more.
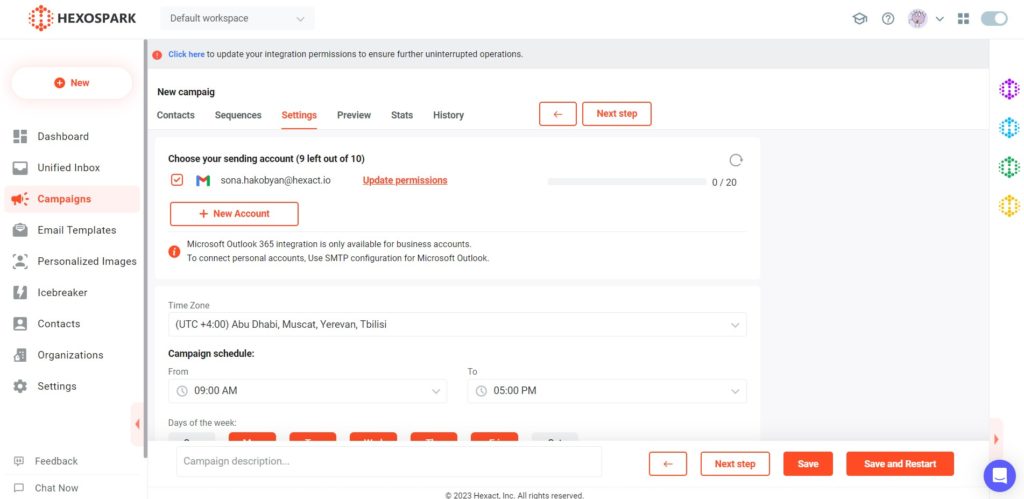
In the settings, you can also add your email sending accounts. Hexospark supports most business email providers including G-suite and SMTP based email providers.
Once you have added your email sending accounts you will be able to select which email accounts you would like to use to send emails from and rotate through these to increase the volume of emails you can send each day.
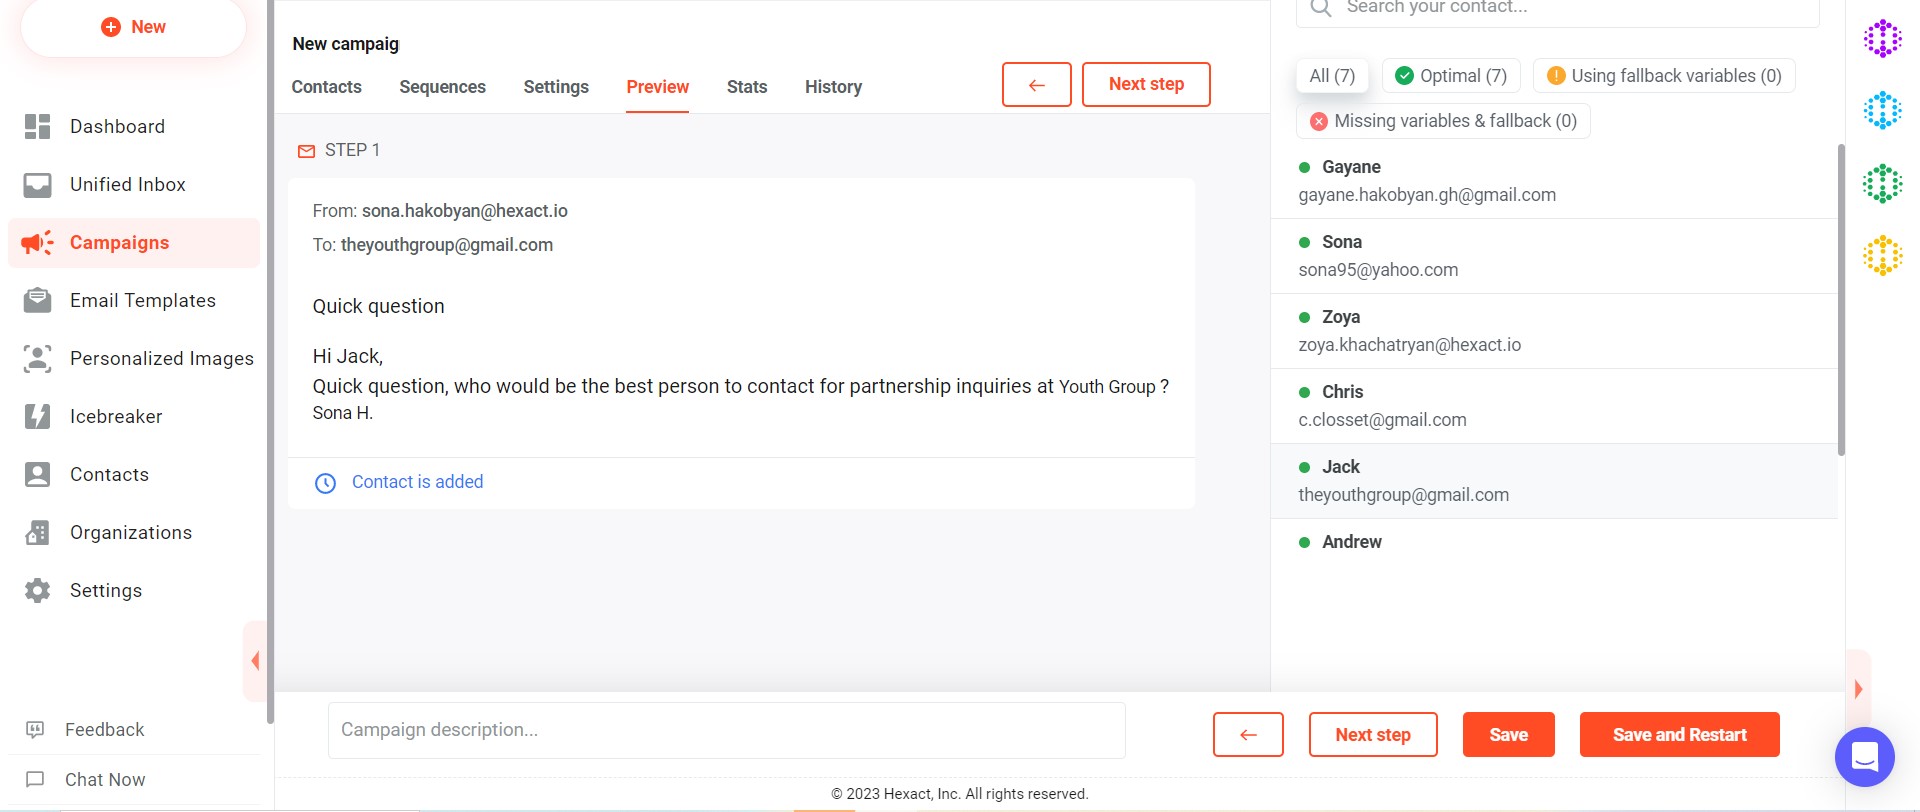
Step 4: Preview the email
Once you’re done with the settings, you can click on the Next Step button to preview the email and check if the campaign includes any missing variables or fallbacks.
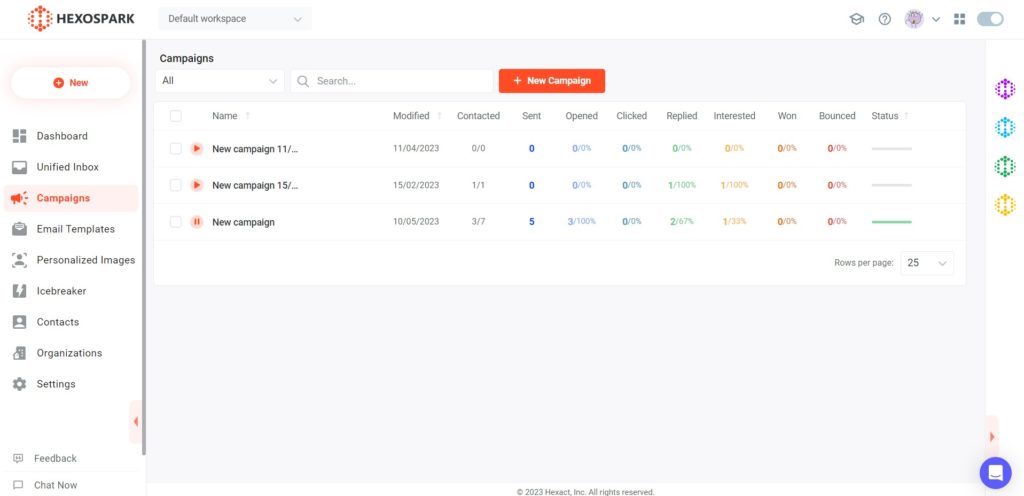
Step 5: Save and run the campaign
Once you have set up all the details of your campaign, you can click Save and Run to go live with your campaign.
You can then add more contacts via the browser extension or by adding more contacts from the Contacts section of your running campaign.
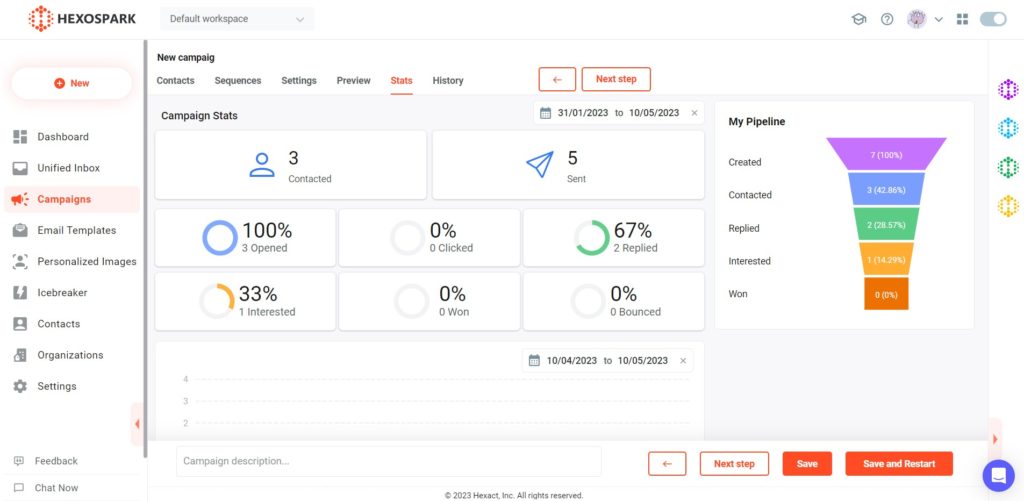
Step 6: Check the statistics
To monitor the performance of the campaign, simply review the statistics. These metrics provide valuable insights such as the number of contacts reached during the current period, as well as the percentages of opened, clicked, replied, and bounced emails.
Happy prospecting.

Marketing Specialist | Content Writer
Experienced in SaaS content writing, helps customers to automate time-consuming tasks and solve complex scraping cases with step-by-step tutorials and in depth-articles.
Follow me on Linkedin for more SaaS content