


Are you facing challenges with email deliverability and experiencing bounces, even after putting extensive effort into your email marketing strategy?
You can put those worries aside, as we have the expertise to resolve this issue.
Improper configuration of DMARC, DKIM, and SPF records is one of the potential causes for your emails being marked as spam.
To tackle this problem, it is crucial to familiarize yourself with a few technical details. And that’s exactly what we are going to show you in our setup guide!
What do SPF, DKIM, and DMARC mean?
Before starting the setup process it’s important to know what these abbreviations stand for and how different they are from each other.
So, what is Domain-based Message Authentication, Reporting & Conformance (DMARC)?
DMARC is an email authentication protocol the purpose of which is to prevent email spoofing and phishing and increase your email deliverability. It checks if the email messages come from where they are supposed to. Besides the email authentication capabilities, DMARC offers reporting, so that domain owners easily examine email authentication statistics on their domains.
When DMARC is correctly implemented in the p=reject mode, it has the ability to prevent all unauthorized emails originating from the specific domain, effectively blocking them. At the same time, it ensures that all genuine and legitimate emails successfully pass through without any hindrance.
DMARC aligns SPF (Sender Policy Framework) and DKIM (DomainKeys Identified Mail) mechanisms to enhance email authentication and security.
What’s SPF and how does it work?
SPF (Sender Policy Framework) acts as a protective measure against email spoofing by verifying that the sender’s IP address aligns with the authorized sources designated by the domain owner. This verification process strengthens email security and ensures that emails are sent from legitimate sources, bolstering trust and reducing the risk of phishing or fraudulent activities.
If you don’t set up SPF properly or fail to include all the necessary authorized IP addresses and domains, scammers can exploit this gap. They can send emails that appear to come from your domain, deceiving recipients into believing the messages are legitimate. This practice is known as email spoofing.
It should be noted that there can be only one SPF record for one domain. However, there can be different servers and IP addresses within one SPF record.
What’s DKIM and how does it work?
DKIM (DomainKeys Identified Mail) serves as a technical standard that verifies the authenticity of email messages, combats spam, and mitigates the risks of spoofing and identity theft.
By appending a digital signature to the email header, DKIM provides evidence that the email genuinely originates from a specific organization. This signature is subsequently validated by email servers to ensure the integrity of the email content. Similar to SPF, DKIM records are stored in the DNS.
How to check if the technical setup is okay?
To ensure that your technical setup is functioning correctly, here are some straightforward methods to conduct a self-check:
DKIM, SPF, and DMARC check via Gmail
There are two options for checking DKIM, SPF, and DMARC through Gmail. The first option is with the help of a test message.
To verify the status of your DKIM and SPF configuration, you can perform the following steps:
- Send a test email to your address.
- Open the email and click on “show details”
- Check the “mailed-by” and “signed by” headers.
- If the “mailed-by” header shows the domain name and the “signed-by” header displays the sending domain, your DKIM and SPF settings are in good order.

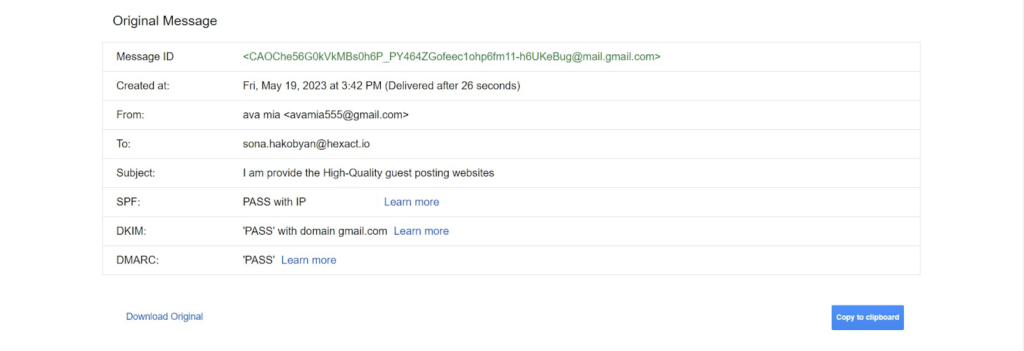
You can also check the technical setup by choosing the “show original” in the email.
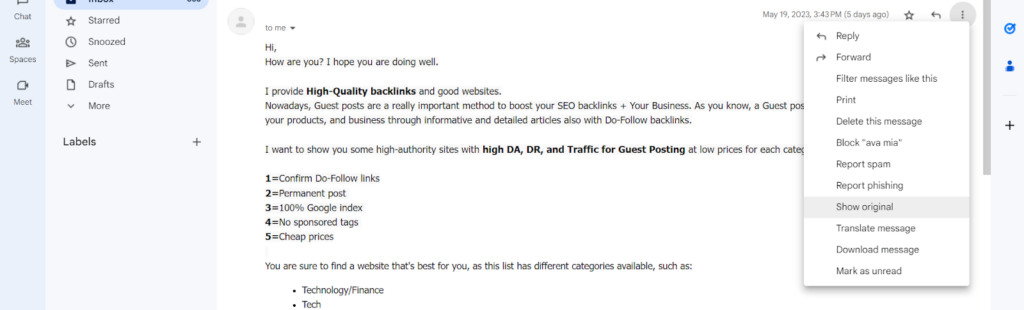
Now you can easily check the SPF, DKIM, and DMARC records by following the provided steps.
Checking SPF, DKIM, and DMARC Records in Windows
To check the SPF, DKIM, and DMARC records in Windows using the command line, you can follow these simple steps:
🔍How to check SPF records
- Firstly, open the command prompt on your computer. You can do this by pressing the Windows key, typing “cmd” in the search bar, and selecting the Command Prompt application.
- In the command prompt window, type the following command:
| nslookup -type=txt domain.com |
Remember to replace “domain.com” with the actual domain name for which you want to check the SPF record.
- Press Enter to execute the command.
- The command output will show the TXT records associated with the domain. Look for a record that starts with “v=spf1” or contains “spf1”. This indicates the presence of an SPF record for the domain.
Example output: “v=spf1 include:_spf.google.com ~all”
If there are no results or the output does not contain “v=spf1”, it means there might be a problem retrieving the SPF record for the domain, or the record does not exist.
🔍How to check DKIM records
- Open the command prompt on your computer. You can do this by pressing the Windows key, typing “cmd” in the search bar, and selecting the Command Prompt application.
- In the command prompt, type the following commands:
| nslookupset q=txtselector._domainkey.domain.com |
- Replace “selector” with the specific DKIM selector and “domain.com” with the domain you want to look up. Then press Enter to execute it.
To find the DKIM selector go to any email you’ve sent and click on “show original”. Then scroll down. The value after the “s=” tag represents the DKIM selector.
🔍How to check DMARC policy
- Open the command prompt on your computer and type the following command:
| nslookup -type=txt _dmarc.domain.com |
- Replace “domain.com” with the actual domain for which you want to look up the DMARC policy. Then press Enter to execute it.
DKIM, SPF, and DMARC check in Mac OS Terminal
For Mac users, the process of checking is a bit different as the verification is done through the Mac OS Terminal. You can follow the instruction below and substitute the words selector and domain with the domain you are checking.
| Record | Mac OS Terminal |
| SPF | dig txt domain |
| DKIM | dig txt selector._domainkey.domain |
| DMARC | dig txt _dmarc.domain |
SPF, DKIM, and DMARC setup
Remember that it’s important to follow the correct order when configuring SPF, DKIM, and DMARC records. Make sure you set them up according to the instructions mentioned below:
- Set up SPF for the domain.
- Set up DKIM for the domain.
- Set up a mailbox for reports.
- Obtain the domain host sign-in information.
- Check for an existing DMARC record.
- Change the DMARC policy.
⚙️ How to setup SPF records
Remember that the setup process differs depending on the domain host. Here’s how you can set up your SPF records for Google:
- Access your DNS settings through your domain registrar or DNS hosting provider. This can be done through platforms like Namecheap, Cloudflare, Bluehost, or others.
- Locate the option to create a new DNS record, typically labeled as “Add Record,” “Create Record,” or similar.
- Choose the record type as TXT (Text).
- In the “Name” or “Host” field, enter “@” to represent the root domain.
- In the “Value” or “Text” field, paste the SPF record value. As an example, the SPF record “v=spf1 include:_spf.google.com ~all” is commonly used for Google services.
- Save the changes to publish the SPF record.
Below you can find detailed instructions for the most common domain hosts. To set up the SPF record, follow the steps mentioned for your domain host:
⚙️ How to setup DKIM records
The following steps outline the process of setting up DKIM:
- Sign in to your Google Admin console.
- Click on the menu in the top left corner and navigate to “Apps” > “G Suite” > “Settings for Gmail” > “Authenticate Email.”
- Select your domain from the drop-down list. Click on “Generate New Record” to create a new DKIM record. Copy the provided hostname and the corresponding TXT record value.
- Log in to your DNS management interface provided by your DNS service provider (e.g., Namecheap, Cloudflare, Bluehost, etc.).
- Locate the domain list and choose the domain you want to configure DKIM for. Access the advanced settings or DNS management section.
- Add a new record, selecting the record type as TXT.
- Enter the copied hostname from Google in the “Name” field of the TXT record.
- Paste the corresponding TXT record value provided by Google in the “Value” field.
- Save the changes to update the DNS records.
- Return to the Google Admin console and click “Start Authentication” to initiate the DKIM authentication process.
- Wait for the DNS changes to update across the internet. This process may take some time, typically up to 48 hours.
Here you can find more details about the DKIM setup for common domain hosts:
⚙️ How to setup DMARC records
To configure DMARC for your domain, follow these steps:
- Access your DNS settings provided by your domain registrar or DNS hosting provider (e.g., Namecheap, Cloudflare, Bluehost, etc.).
- Create a new DNS record for DMARC.
- Select the record type as TXT (Text).
- Enter the hostname, which is typically “_dmarc” (without quotes).
- Add the DMARC record value, which specifies the desired policy and reporting options.
Here’s an example of a sample DMARC entry:
| v=DMARC1; p=quarantine; rua=mailto:[email protected]; ruf=mailto:[email protected]; fo=s |
v: A mandatory tag-value that specifies the DMARC version.
p: Mail processing policy. Choose one of the options: none, quarantine, or reject.
rua: Email address to receive statistical reports. The address must belong to the same domain as the DMARC record.
ruf: Email address to receive reports on failed authentication checks. It’s recommended to have a separate mailbox for this.
fo: Determines when reports are sent to the domain owner. The values can include 0 (for SPF and DKIM check failures), 1 (for either SPF or DKIM check failure), d (for each DKIM verification), and s (for each SPF check).
- Finally, save the changes to publish the DMARC record.
By following these steps, you can configure DMARC for your domain. Remember to ensure that you have already set up SPF and DKIM records for the domain before configuring DMARC.
For more detailed instructions you can have a look at the steps provided by your domain host:
Frequently asked questions
How to get all emails delivered?
To increase the email deliverability of your campaigns, you should follow several best practices. One of them is to authenticate your emails. It’s important to implement email authentication protocols, such as SPF, DKIM, and DMARC to make sure your emails are protected from spoofing and phishing attempts.
How to verify the sender’s IP address?
There are several ways for verifying the sender’s IP address. Some of them include checking the SPF record of the sender’s domain, performing a reverse DNS lookup on the sender’s IP address, or using IP reputation lookup services that involve information about the IP address’s reputation.
How to check which organization the email belongs to?
To check which organization a certain email belongs to, you can open the email and look at the “from” field in the email. The domain name in the email address will most likely indicate the organization the sender is from. You can also check the email signature in the emails. Email signatures usually provide general information about the sender, such as their name, profession, company, and contact details.
To sum up
Now that you know how to set up SPF, DKIM, and DMARC correctly, you can easily increase the email deliverability of your campaigns.
Follow the steps mentioned for each provider and you’ll be set for effective email outreach campaigns. The latter can be done with the help of Hexospark– one of the best email outreach and CRM platforms!

Content Writer | Marketing Specialist
Experienced in writing SaaS and marketing content, helps customers to easily perform web scrapings, automate time-consuming tasks and be informed about latest tech trends with step-by-step tutorials and insider articles.
Follow me on Linkedin